🚀 How to Get Started
To start using the Waliduino, you only need three things:
-
The Waliduino board
-
The USB cable (included in the box)
-
The Arduino IDE (a free program you install on your computer to write and upload code)
Once you have these, you’re ready to connect the board and begin your first project. Don’t worry—we’ll walk you through everything!
💻 Installing the Arduino IDE (Windows)
To program your Waliduino board, you need to install the Arduino IDE—a software that lets you write code and send it to the board.
Here is a simple step-by-step guide:
✅ Step 1: Go to the official website
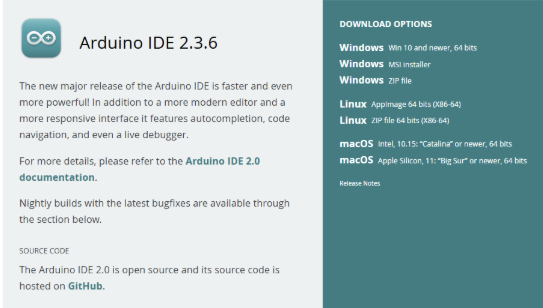
Open your browser and go to:
👉 https://www.arduino.cc/en/software
✅ Step 2: Download for Windows
Choose your suitable package for your operating system. Below is an example for Windows 64bits
You will see a button like this:
📥 “Windows Win 10 and newer, 64bits”
✅ Step 3: Allow the download
When your browser asks if you want to keep the file, click “Yes” or “Keep”.
👉 You can either:
-
Choose an amount and donate, or
-
Click “Just Download” to get it for free
Both options will start the download of the installer.

After you click “Just Download”, you may see a pop-up asking if you want to join the Arduino newsletter by entering your email.
👉 You can either:
-
Enter your email to subscribe, or
-
Simply click “Download” again to continue without subscribing
Your download will then begin automatically. If your browser asks for permission, click “Keep” or “Yes” to allow the download.

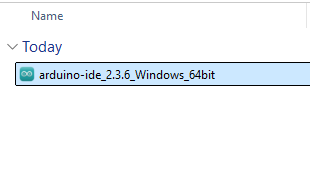
✅ Step 4: Start the installer
Double-click the downloaded file (something like arduino-1.x.x-windows.exe) to begin installation.
✅ Step 5: Agree and Install
- Click “I Agree” to accept the license.
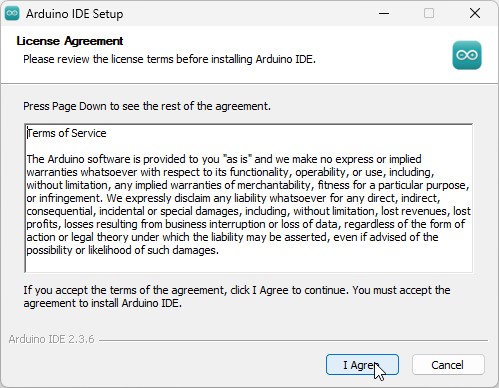
-
Keep all default options selected.
- Click “Next”, then “Install”.
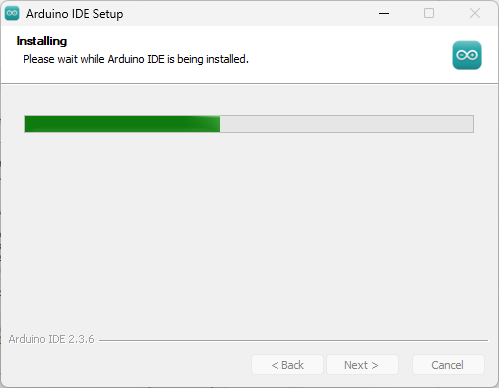
✅ Step 6: Wait for the installation
The installer will copy all needed files and drivers. This may take 1–2 minutes.
✅ Step 7: Finish the Installation
After the setup is complete, you’ll see the “Completing Arduino IDE Setup” screen.
- If the box “Run Arduino IDE” is checked (✅), clicking Finish will automatically open the Arduino IDE.
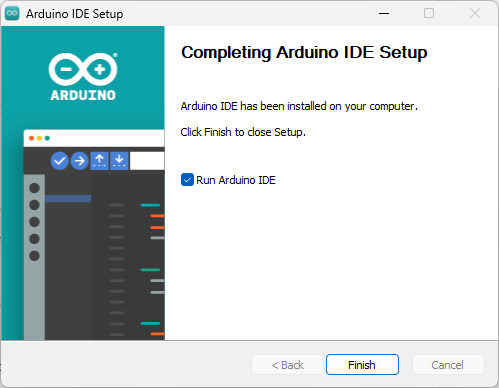
- If you want to open it later, just look for the Arduino icon on your Desktop or in the Start menu.
🎉 You’re now ready to start your first project with Waliduino!
🖊️ Exploring the Arduino IDE Editor
This is what the Arduino IDE looks like when you open it. The editor is where you write the code (called sketches) that tells your Waliduino what to do.
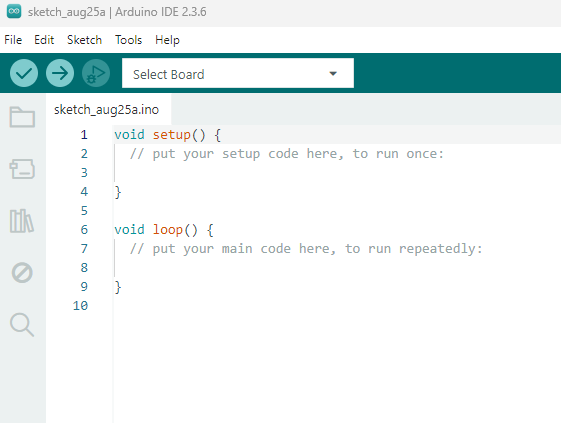
Let’s look at the most important parts:
📝 The Code Area
In the middle, you see two basic functions:
setup()runs once when the board is powered on or reset.void setup() { // put your setup code here, to run once: }loop()runs again and again—this is where your main program goes.void loop() { // put your setup code here, to run once: }
This is the place where you’ll write your own code for sensors, LEDs, motors, and more!
🧩 Board Manager (Left Sidebar)
On the left side, there is a section called Boards Manager. This is where you install the right board package so the Arduino IDE knows how to talk to your Waliduino.
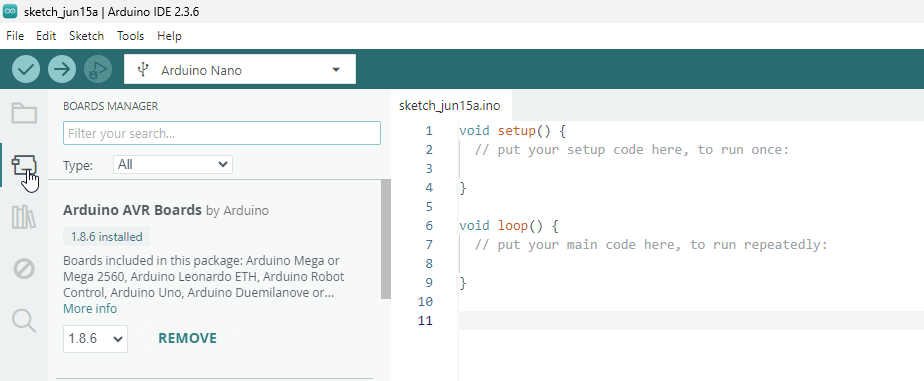
👉 Important: Before you upload code, make sure you install the Arduino AVR Boards package. This supports the Arduino Nano, which is the brain of the Waliduino.
To install:
-
Search for “Arduino AVR Boards”
-
Click Install (you’ll see “Installed” once it’s done)
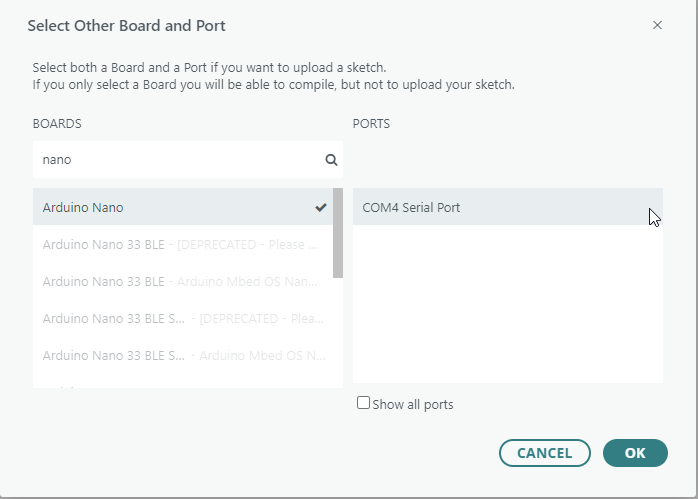
Select Board and Port
Make sure to select the “Arduino nano” as Board and to select the correct COM Port where the Arduino nano board is attached via USB to your PC.
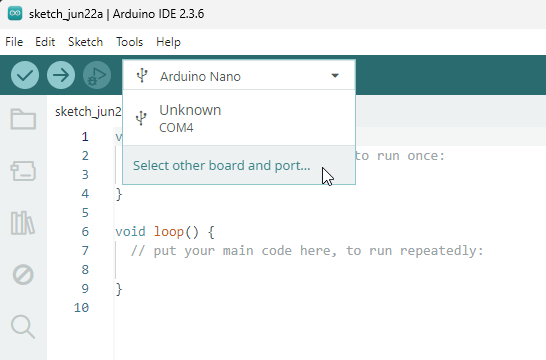
Once this is set up, you’re ready to choose the board and port, write your first sketch, and upload it to the Waliduino!
🔌 Installing the USB Driver for Waliduino
To connect your Waliduino board to your computer and upload code, you may need to install a USB driver. This driver helps your PC recognize the board through the USB cable.
👉 After downloading, follow the installer instructions and restart your computer if needed.
Once installed, your computer will recognize the Waliduino board when connected, and the COM port will appear in the Arduino IDE.
Go to Tools > Board and select Arduino Nano.
Then go to Tools > Port and choose the port where your Waliduino is connected (usually something like COM3, COM4, etc.).